I received product and/or compensation for this post. All opinions are 100% mine.
Part of living in an older home is that it doesn’t have some of the fancy modern features like, say a master suite or a powder room. What we do have is one bathroom on our main floor that is used by everyone. My husband, my kids, our guests and me. It isn’t the biggest bathroom ever and it came with some less than desirable storage features. One of my biggest pet peeves is the lack of counter space.
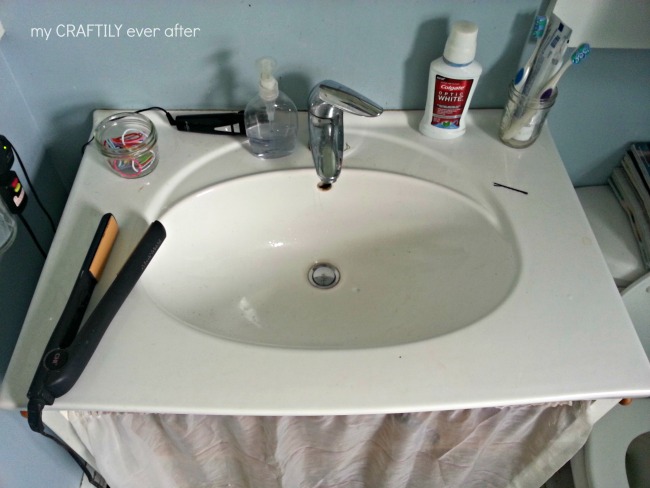
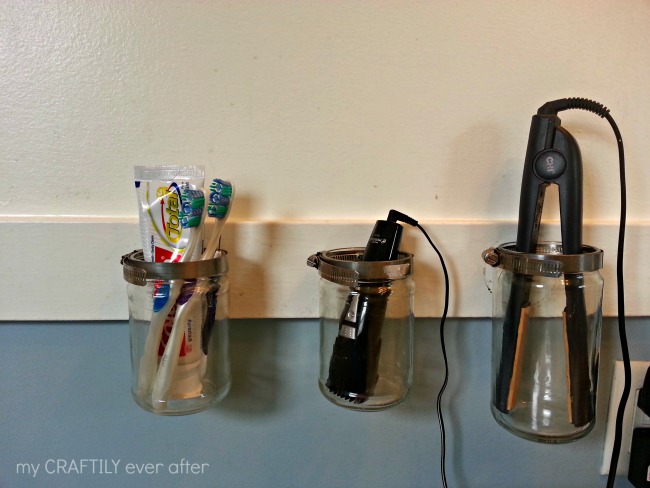
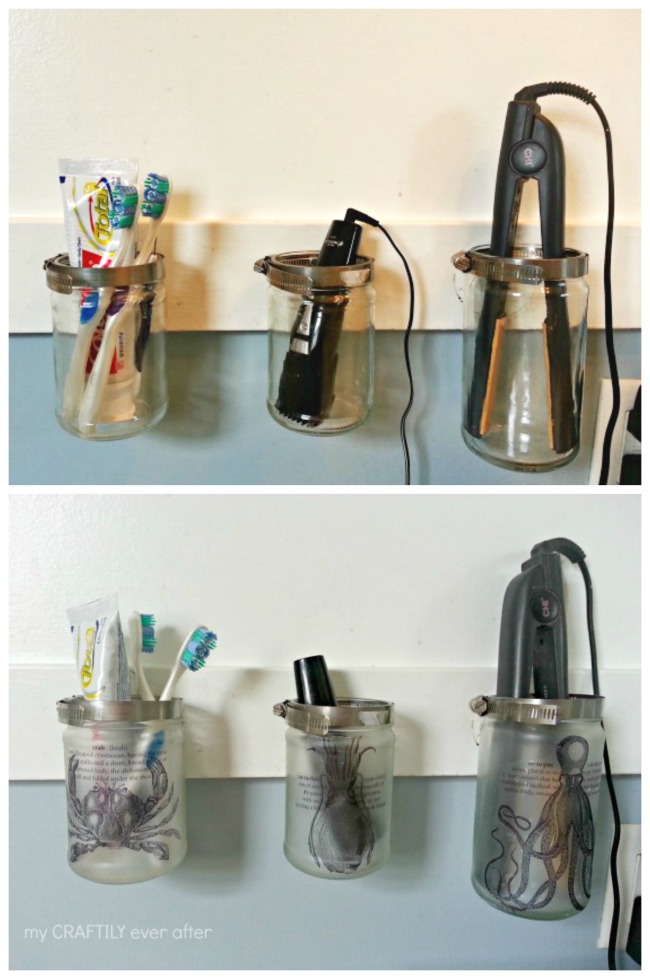
It doesn’t look so bad, but let me tell you it wasn’t working for us. My girls are water babies in the most serious way. I will often find them hiding in the bathroom playing in the sink, spilling water everywhere and knocking things onto the floor. I don’t know about you, but I have a serious love for my flat iron and I can only take it being dropped so many times before I turn into a scary mommy. I decided to use the same idea as here as a way to get everything up off the counter and in a safe place. That worked wonderfully, but it wasn’t very pretty to look at.
I had a brilliant idea to use temporary tattoos to add images to the outside of the jars. In my head it would look like the designs had been printed directly on the glass, which I thought would be pretty amazing. I considered using a clear sticker, but I didn’t want to be left with that annoying outline that will eventually peel up and leave them looking like less than the best. I also considered using mod podge, but I was worried about smearing the design or ending up with streaks. So a temporary tattoo it was. The only thing you have to worry about is water, and I had a plan for that.
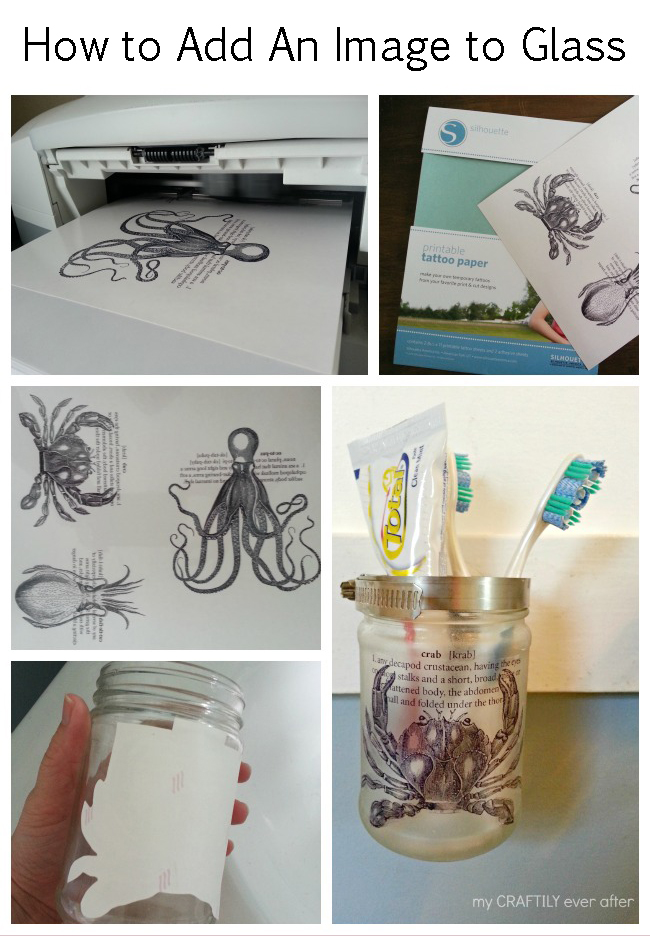
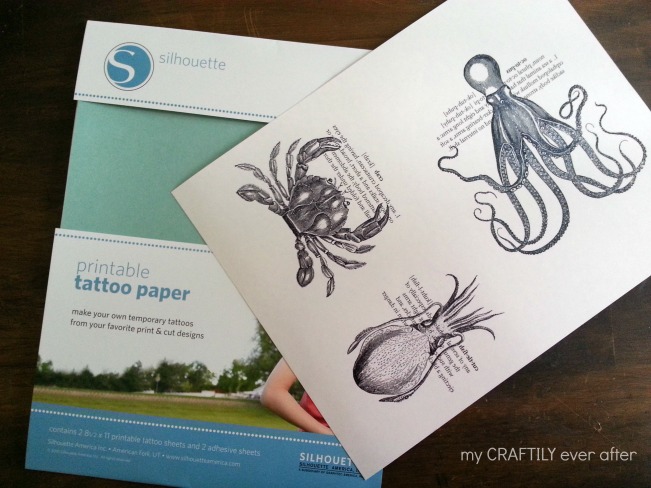
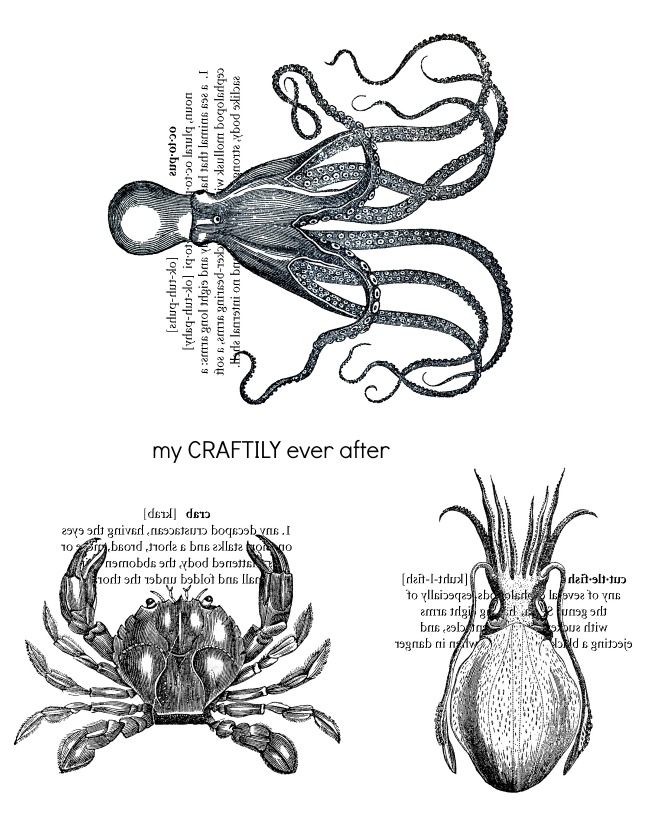
First off, you will need some temporary tattoo paper. This stuff is the best in my opinion. Not to mention that I ordered it on a Tuesday from Expressions Vinyl and it showed two days later on Thursday. Hello! It’s like they knew I was the least patient girl in the whole wide world! While you are waiting for your paper you will need to come up with your design. I am slowly turning our bathroom into a beach inspired space. I’m trying to be restrained and not go too overboard because I feel like at any moment I am one starfish away from kitchy, and that is no good. So figure out what design you want. I found these amazing vintage sea creatures on the graphics fairy and knew that they were going to be just the thing! I added in some dictionary definitions (because who doesn’t love the way that looks) and then saved them as mirror images. Why you ask. Because the tattoo paper directions said to. You can click on the image below to be taken to a download page if you want to use these designs yourself. You’re welcome!
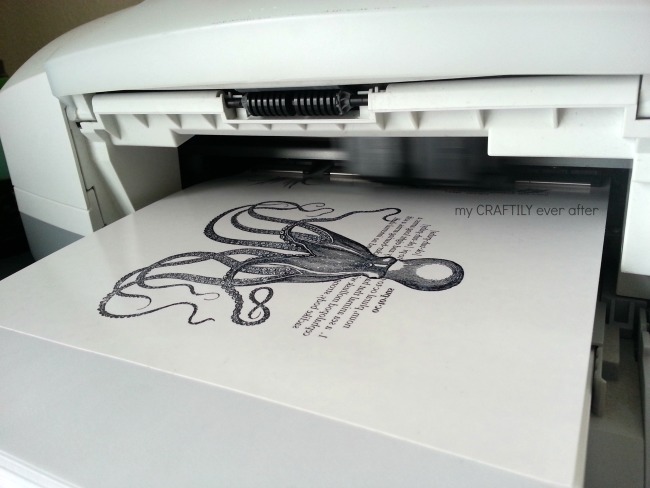
Once you have your designs saved and your paper in hand you will need to print them. You will print your mirrored images onto the glossy side of the white tattoo paper. You will know it is the right side because the other side is marked up with a pattern. Fool proof! You’ll want to set your printer to photo paper settings, so if you don’t know how to do that look online! Every printer is different so what works for me might not work for you. Because you are using that setting, when you paper comes out of the printer the ink will still be wet. Set it aside and wait for it to dry completely!
Once the ink is dry you are going to take the top sheet of tattoo film and peel just the top lip off. It is pre-sliced so that you don’t even have to work for it, just bend and peel. Now VERY carefully stick the film to your printed images. Once you stick it there are no take backs so take your time and line it up. After that initial edge is down you can peel off the rest of the green paper and smooth it down as you go over the rest of your soon to be tattoos! Make sure you take something smooth and flat at this point and really smooth out any air bubbles and get your papers really stuck together.
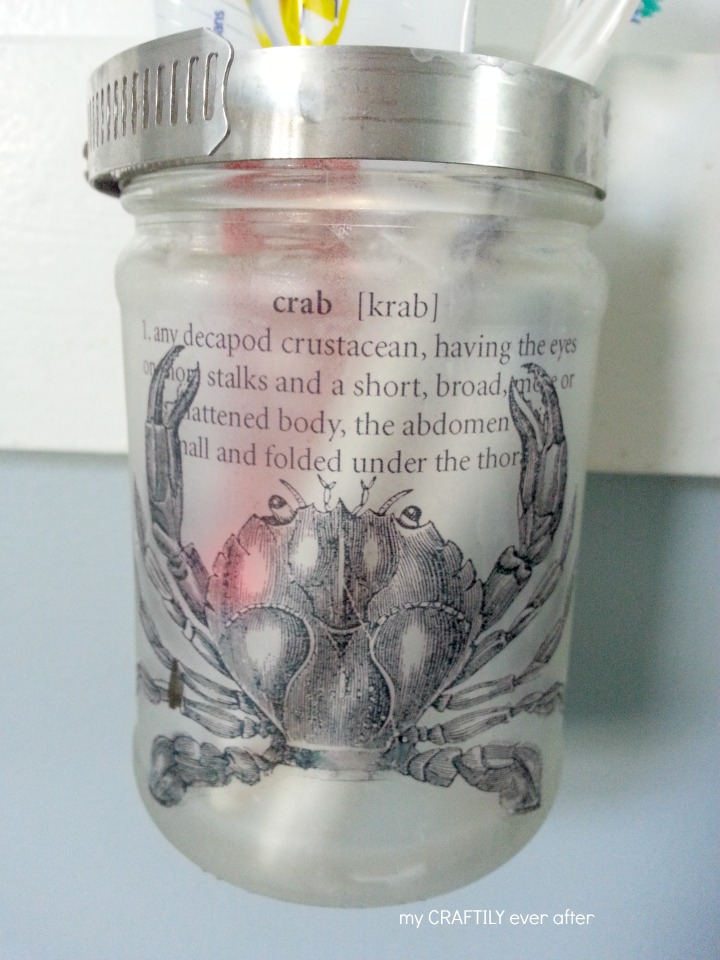
Now we cut! I decided to cut as close as I could to my design so that there would be as little extra tattoo as possible. Once it was cut out I peeled off the clear paper layer and applied it to the jar just like you would to your body. I used a wet rag to apply pressure and water to the back of the paper and within a minute the paper slid right off leaving me with my tattoo. Before you do anything else you will need to let them dry completely (I used a hair dryer to speed this up – I told you I’m impatient) and then take them outside and give them a good spray with a clear coat sealer. This will protect your images from washing off accidentally if any water spills on them.
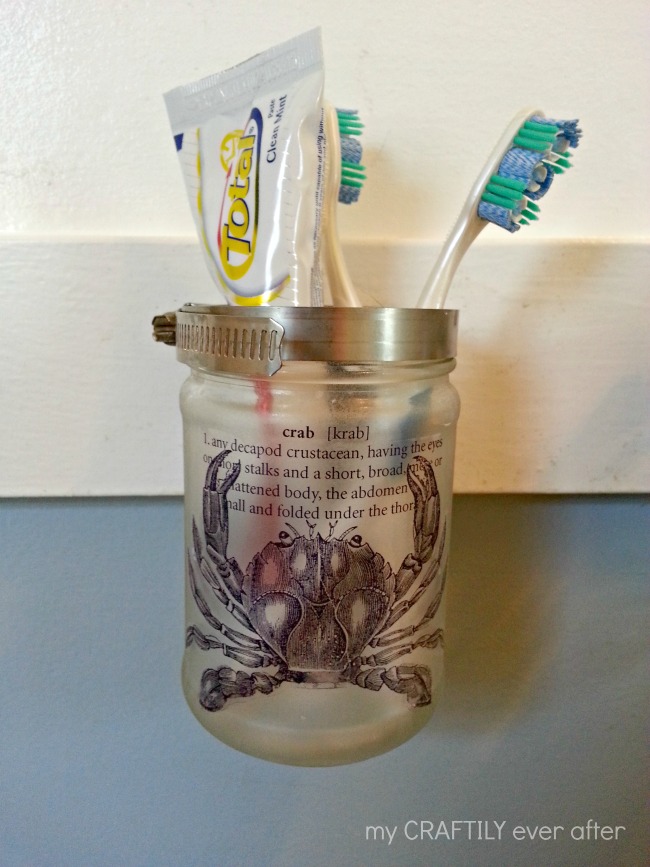
They are so amazing! The before and after is such an improvement and I love that my bathroom counter is clutter free! No more worrying about the kids knocking my flat iron into the sink or onto the floor. No more worrying about the little ones grabbing my toothbrush and using it for who knows what!
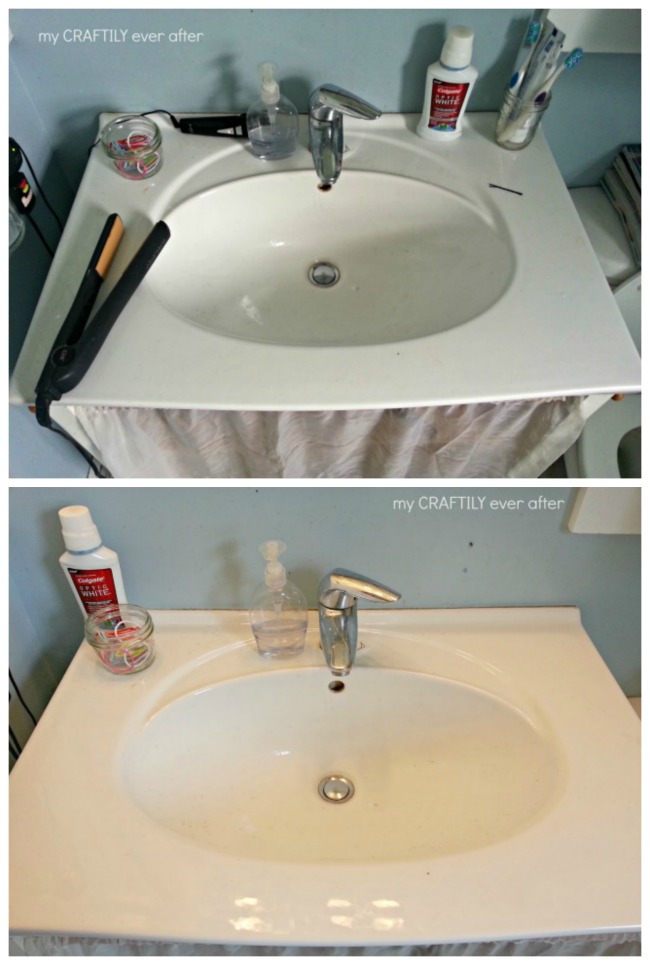
And the jars are not only pretty to look at, but they are also super functional, which makes both my husband and I very happy!

I stumbled on to this page looking for a solution to a problem that is not even close to an old home sink. What I have is putting on a gold colored logo on several glass entry doors to a shopping mall. The logo is the just the letter K in Vivaldi font.
I am not in the US, I am in a developing country where the skills and material choices are limited. The local “pros” who did what stands today is vinyl cut lettering on simulated frosted vinyl sheet that they stuck on to the glass door surface. It looks sophomoric and hurts the branding we want to cultivate for the mall.
I am totally uninitiated to glass etching and colored logos on frosted panels on glass doors. Hence the google search brought me here. I would like to know if the tattoo paper trick would work on such a large surface as glass panel doors, the skills needed, do I have to take the glass door down to do it or can I do it with the door up, how to frost the the background etc.
If some one wishes to be updated with most up-to-date technologies afterward he must be pay a visit this web page and be up
to date every day.
What a great use for silhouette tattoo paper! I love it!
This is amazing! I’m getting ready to do some glass jars for our bathroom too and this is just the something that will add some pizzazz to them. Pinned 🙂
Wonderful idea!! It looks so professionally made. 🙂 I’ll use these for my mason jars.
I’m in love with how they turned out! Let me know if you do some too!
I wouldn’t have ever thought to do that! So fun!
Thanks so much!
This is so awesome!! I had no clue that you could do that, thanks for sharing
This is seriously the coolest thing!!! Pinned it for my own bathroom redo. So awesome!
WOW! Just love this. Who’d a thunk it?
this is such a great idea! Makes it so much more fun – genius girl! =)
I never would have thought to tattoo jars 🙂 So cute!!
You’re a genius! I love this idea. Thank you!
This is such a great idea, Ashley! And I LOVE the mounted mason jars!
This is so cool. Love the final results! I’d love to play with that tattoo paper.
These are awesome! Seriously loving this! (Dude, and Expressions Vinyl IS totally the best for impatient people…not that I’d know anything about that haha!)
What the what? These are amazing! I had no idea tattoo paper even existed.
It is the most amazing stuff! I am trying to figure out what else I can “tattoo”!
These look so cool, great idea. Need to get me some of that tattoo paper.
Thanks! The tattoo paper is pretty incredible!
This is fabulous. I’ve got some printable water slide decal material that I was going to use in a similar way to put images on glass (I haven’t got around to doing it yet) but your idea to use the temporary tattoo paper looks much less complicated. I love your projects too – they turned out great!
Thanks so much! I had such a good time doing these and the end result is so incredible. I totally recommend trying it yourself! 🙂
LOVE this! It turned out way better than I was expecting and I love the pictures! You did an amazing job!!!
Thanks!! They came out even better than I was imagining too!!