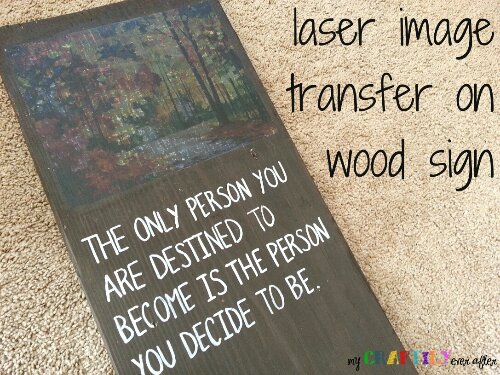
This is one of the simpler projects I have tackled lately, you really just need to have a bit of patience to complete it! You can use any image you want and you can transfer it onto any surface you like. I chose to use wood, because I am in an earthy decorating place and since my image was of a fall scene it fit perfectly! The first step is finding an image that you like. You will need to print this on a laser printer (like at Staples or your favorite printing place) on the thinest paper available (regular 24 lb works just fine). It is important to remember that if you are using words or your image specifically goes one direction only that you will need to flip your image BEFORE you print it so that when you lay it face down it will be facing the right direction. You can easily do this in your photo editing program before hand.
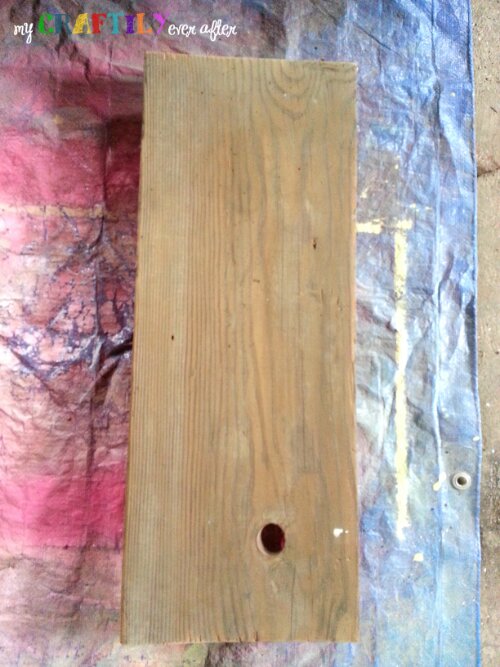
Once you have your image printed off you will need to prepare your surface. I used an old leftover piece of wood I snagged from my neighbors burn pile. It was rough so I lightly sanded the surface and the edges so that my image would lay relatively smoothly. I chose to stain my board before hand, but this can make it hard to see your image and I recommend that for the first couple of attempts you use unstained wood. Those wooden plaques you can buy at Joann’s or Michael’s are the perfect starter pieces for this project! Once your image is printed and your wood is prepared you will need to apply a gel medium to your image. You simply brush it directly onto the paper (just a thin layer) and then place it face down onto your surface. You will want to rub it down either with your hand or a brayer, just make sure not to move it around too much! Then comes the hard part. you have to let it dry for at least 8 hours!! I usually do this step right before bed so that all the waiting time happens while I am sleeping and I don’t really notice it!
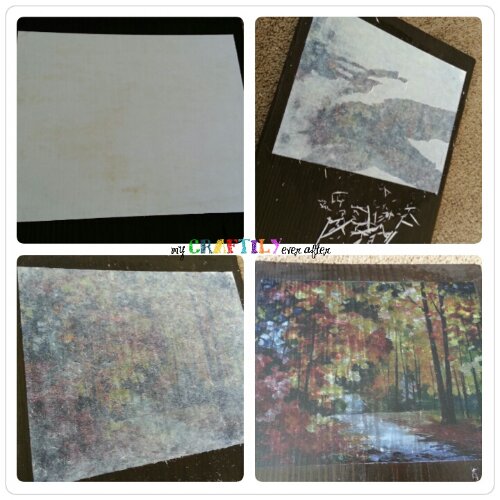
Once it is fully dry you will want to get a wet rag and dampen your paper. You don’t want it soaking wet, but you need to get it wet enough that you can start to rub the paper away. My son describes this process like applying a temporary tattoo to the wood. You put the wet rag on and the paper backing just sort of falls off. Once your paper is wet you will gently rub your hand over it and peel away the layers of paper until you can see your image.
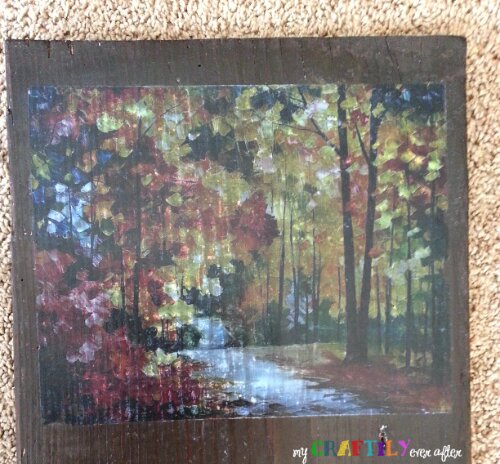
Once you can see your image you want to be very careful. If you rub too much you will rub your picture right off the wood. It is best to work slowly and let your paper dry a little bit as you go so you can see where the paper is sticking. Gently go over those areas again until you have removed enough of the paper to see your image, but not the image itself.
Once my image was transferred onto the wood, I used the same technique as here and here to add an inspirational quote. Once it was dry I simply attached a picture hanger to the back of the board and it was ready to hang! This is a super fun project that you can customize to fit any personality and any decor. It is also cheap enough that you can do one for each season and create your own holiday decor at a fraction of the price! Let me know if you try this technique and share a picture of your work!
Now it’s time to party!!
That’s right, it’s time for our weekly Trick or Treat blog hop! I partnered up with these four lovely ladies to bring you all the best in seasonal ideas from around the interwebs! So check out our features below and then then link up your favorite project or recipe to the link up below!

1. Krystal’s pick: Fall decor by Blue Cats and Roses
2. Jessica’s pick: Spider treat bags by Tanya’s Creative Space
3. Ashley’s pick: Googly Eye Medallions by Crafting in the Rain
4. Victoria’s pick: Foam bats by The Sweet Life
5. Randi’s pick: Bat garland by TitiCrafty
Please read and follow the rules before adding your link.
1. You may link up as many projects as you would like. They need to be YOUR creations and projects.
2. Link directly to your post and NOT to your main blog.
3. Please no giveaways, promotions, items for sale, roundups, or posts that do not belong to you.
4. Please make sure to click and check out the other projects linked up!
*By submitting your link you are authorizing me to post your projects and pictures as a feature and on various social media websites along with links to your post. I have the right to delete links that do not adhere to the rules.





certainly much like your site and you should look at the transliteration upon some of your site content. Several of them are rife by using punctuation challenges so i to discover the item really irritating to see the certainty however I’m going to undoubtedly give back again.
On this transfer the picture to wood, what kind of gel needs to be used? I love this idea!
It’s called gel medium. You can find it in the painting supply section at any craft store or even Walmart!