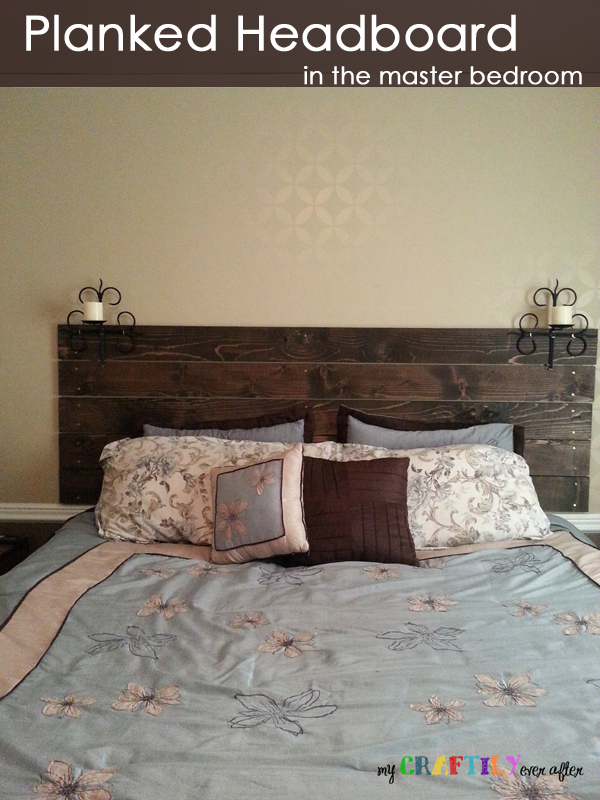
So I’ve been dreaming of a wood headboard for about a year (or two) now and picked up a few pallets last summer with the intention of pulling them apart and using them as a headboard. The only problem is that pallets are notoriously hard to take apart and I am a chicken about using the reciprocating saw. I kept waiting for my hubby to cut them all apart, but he works so hard that the last thing he wanted to do at the end of the day was dismantle a bunch of pallets, so they just continued to sit in my garage. I’ve been pinning pictures of wooden headboards on Pinterest for a while and finally came across this one. It was super simple and totally doable in an afternoon so I showed it to my hubby and he agreed that it was a go! Here is my inspiration pic.
Since I’d finally decided that the pallets were never going to get dismantled I headed over to our local Home Depot to pick up some boards. I settled on 5 1x6x8 boards, I really wanted the 1x8x8 boards, but there was no way to justify the price. These boards came in at just under $5 each and once I grabbed another box of screws (just to be safe) my grand total was $30. I decided while I was out tempting fate with good fortune I might as well stop by our Habitat Restore and see if there were any goodies waiting for me. Well wouldn’t you know it, I found two awesomely perfect candle holders (minus the weird legs, which the hubby assured me I could cut off) that were going to be the exact right thing to finish this project off, and only $10!!
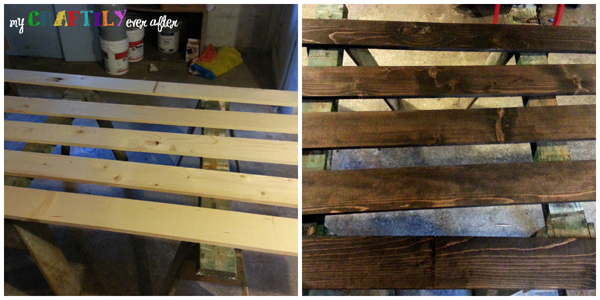
Once I got home I hauled my boards into the basement shop and cut 12″ off of each board. Our bed is just shy of 7′ wide and I knew that I only wanted an inch or two of overhang on each side. Once they were cut I laid them all out on sawhorses and gave them a light sanding. I didn’t go to crazy, just a quick once over to make sure there weren’t any super rough spots. Once the boards were all lightly sanded and the sawdust brushed off I got out the stain. I love the stain that we used for the dining room table so much and we just happened to have a bunch of it leftover! I gave it one light coat, rubbing it on with one side of a rag and using the other side of the rag (and my forearm) to rub the excess off in the same motion. I knew that I was going to want them spaced out just a bit and so I made sure to stain both the top and bottom edges as well as both ends.
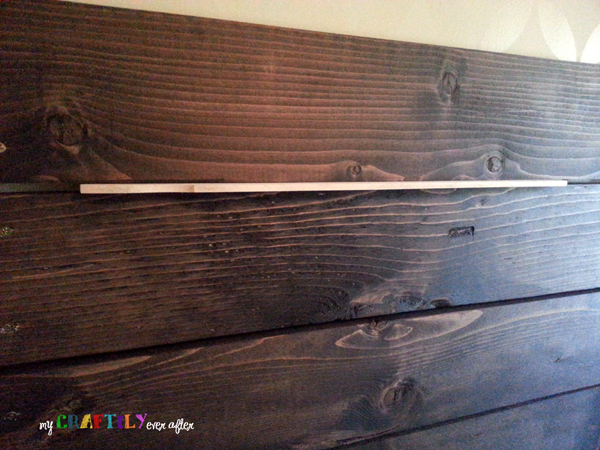
It took a couple of hours for the stain to dry and once it did I gathered up my supplies and hauled it all upstairs into my bedroom. We have a chair rail in our bedroom that just happens to be the exact same height as our bed, and I knew that was where I wanted the headboard to start. However whoever installed it did a REALLY bad job and the piece behind our bed is really two pieces and they sort of make a v shape in the middle of the wall. The first thing I did was line up the board so that I had about the same amount hanging over on each side (I just eyeballed it) and then I screwed one side into the wall about an inch above the chair rail. I then moved to the other side of the bed and used a level to make sure that the board was straight before screwing it in. I happened to have about 20 paint stir sticks leftover from various projects and so I simply laid two of them down on the top edge of the board before setting the next board on top of them. This created a very uniform spacing between my boards. I used two screws in each board on each end and worked my way up until all five were hung on the wall. I decided that for a little extra stability I needed an additional screw in the middle of each board so I added one screw to the middle top of each board.
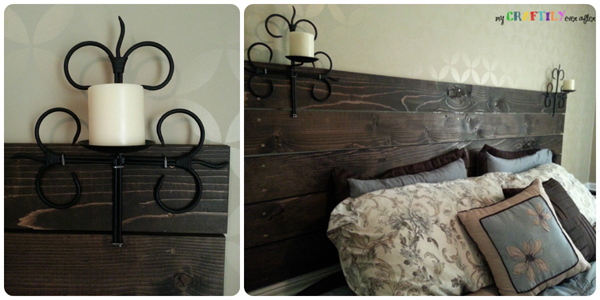
Then came time to cut the legs off those funny candle holders. Because this project was such a whirlwind of activity (I did it the same day I bought all the materials) I didn’t get a before picture of the candle holders. Just imagine if you can that on the bottom of each of these holders were 4 legs that swirled and stuck out in four different directions making them take up a square foot each! My hubby cut those bad boys off with the reciprocating saw and we laid them out on the headboard in a few positions until we found one we liked. We used five industrial staples in each candle holder to make sure that they weren’t going to move around or fall off and kill us in our sleep and then added a couple of yummy vanilla scented candles.
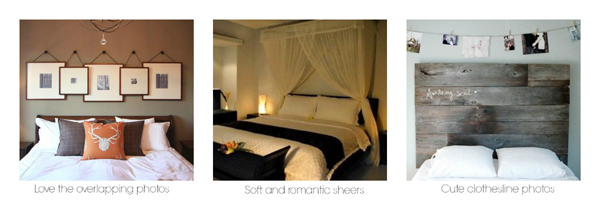
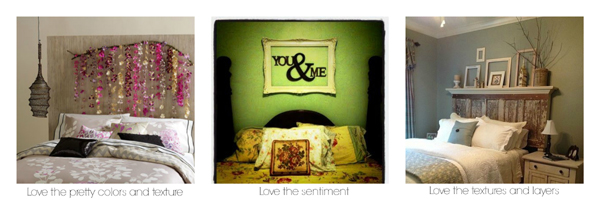
I am totally in love with how this turned out and I am amazed at how fast it went. I don’t know why I waited so long! So here’s where I need your help, I am really bad at finishing touches. I can dream, build, create almost anything, but when it comes to adding those little things that really complete a room I am a wreck! I feel like something is missing from above the bed and I am just not sure what it is! Here are some inspiration photos that I am thinking about, but what do you think? What should I add that would make the space feel complete? It has to be manly (hubby says so)…


This is absolutely gorgeous! I’m moving in!
Come on over!
Great post! Just wanted to let you know your post is featured tonight at Thursday STYLE!
http://wellgroomedhome.com/2014/02/thursday-s-t-y-l-e-link-party-6.html
Stopping by to let you know YOU were featured at Link’n Blogs! Thanks for linking up.
http://iputabirdonit.blogspot.com/2014/02/linkn-blogs-11.html
xo
Daniela
Put A Bird On It
Awesome job! This is gorgeous! Thanks so much for linking up at Thursday STYLE!
Thanks so much Angela! It was such a fun and easy project!
Love the dark color! It’s a gorgeous headboard!
Thanks so much Melinda! I am in love with a dark wood stain!
This would be perfect for our headboard-less guest room! I love the look & the price 🙂 My vote for above your bed would be the overlapping pictures! I’d love you to come link up at our Thursday S.T.Y.L.E. Link Party!
It was such a quick and easy project, inexpensive too! Those are my favorite kind!
I really like this look. We are redoing our room. I will have to remember this idea.
Thanks so much! I really love how grown up it makes our room!
This came out beautifully! Thanks so much for linking up to this weeks Link’n Blogs Link Party! Hope to see you next week! 🙂
Thank you so much! I can’t wait to share some more of my projects with you!