School fundraising is in full force here in my neck of the woods. We had a school carnival a couple of weeks ago and just wrapped up a Bingo night at my son’s school yesterday. The final push for fundraising is at my daughters preschool and it is a big time auction. As a parent I was given the choice of either soliciting donations from local businesses or contributing two baskets (or items) equivalent to the expected donations you would bring in ($30-$60). I am not one to call around and ask people for donations, but I am kinda crafty so I figured I would make some fun stuff to contribute. My original idea was to create a baby basket. I have a half finished baby quilt all ready to finish, but it’s been half done for a year and I know me, I won’t finish it. Instead I decided to make some awesome wooden pallet signs!
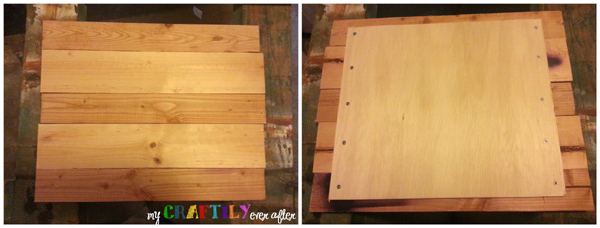
Now if you read my post about my planked headboard, you know that I wasn’t actually going to take apart some pallets to make these signs. And I don’t have a stack of awesome rustic barn wood laying around. Instead I went to my local Home Depot and scoped out the culled lumbar bins. It was like Christmas the day I was there because there were two overly full bins of the most wonderful wood ever! I had to restrain myself from buying WAY too much, but I talked to the guy working in lumber and he let me know what day they pull so I can always go on good days! I picked out a few 1×4’s and a couple of 1×6’s and had them all cut to 4′. This made them super easy to transport, carry and deal with. I also snagged a couple of sheets of underlayment (thin plywood boards) to use as a backer for my sign.
When I got home I laid out my boards, alternating widths to create an interesting look. i decided that the 4 foot length was just a little too long and so I ended up cutting them all down to 30″, which meant that I had two awesome signs instead of one! I go them all laid out exactly how I wanted them and then flipped them over on the sawhorses. I cut the underlayment to fit inside the boards and then screwed in in from the back so you wouldn’t see the screws. Once they were all attached I flipped it over and stained it. I used the exact same stain and method as my headboard. I left it to dry for a few hours and went to mock up my design.
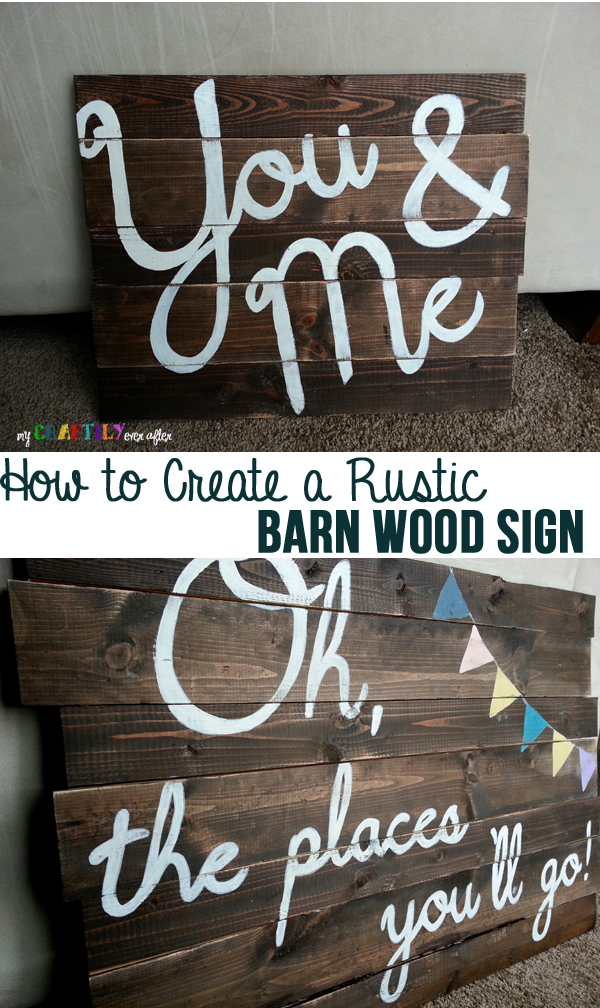
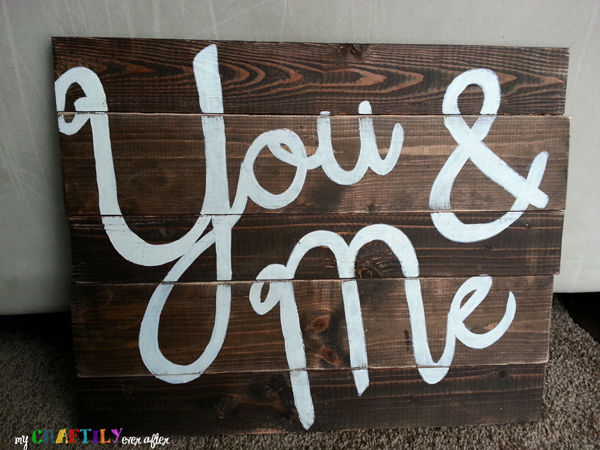
I wasn’t sure what I wanted to paint on my signs, so of course I turned to Pinterest. I spent a couple of hours looking at different signs. I knew I wanted something generic enough that it would appeal to a lot of people, and yet something that felt a little bit personal. I chose to do a sweet “You & Me” for the smaller sign and “Oh, the places you’ll go” for the larger sign. I think that Dr. Seuss is the perfect choice for a preschool auction and the sweet little pennant across the top adds a little whimsy to it.
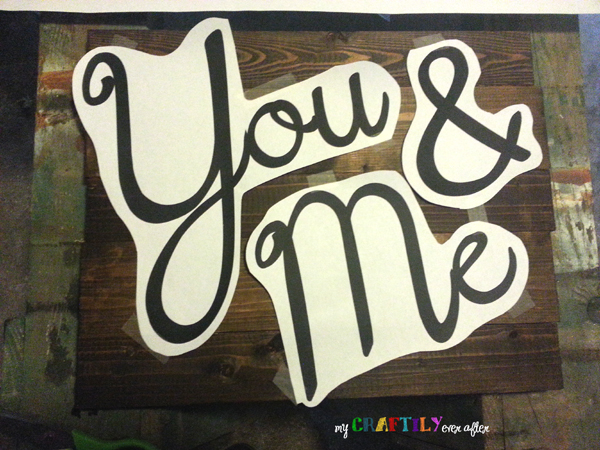
I created an actual size PhotoShop rendering so that I could get the spacing right and then sent them off to Staples and had them printed as engineering prints. I figured this would be easier than trying to line up all those letters on separate sheets from my home printer. However, I probably should have measured the signs again because once I got the engineering prints back neither of them fit! For the small signs I cut out the words and them laid them out on the board finding the right spacing. For the larger sign I cut out the ‘oh,” separately from the “the places you’ll go” and the pennant separate from that. Again I just moved them around until they fit and then taped them to my boards. At this point I used the same technique as here to get the design onto the board. It takes a little bit of time and my hand was a little crampy afterward, but it is a really easy way to get an exact transfer.
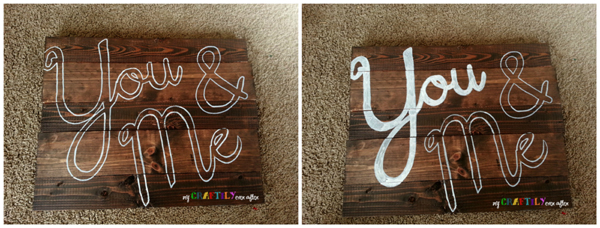
Once the design was transferred I used my trusty paint pen to trace the outlines of each letter and then came back with a small paint brush and an oops jar of regular latex paint to fill them in. It took two coats of paint to get good coverage that didn’t show all the brush marks. I swear someday I’ll win a Silhouette and just make stencils, but until then this is how I roll. Once the paint was dry I took them back down to the shop and ran a sander over them just a little bit to get them distressed. Not too much, just a smidge! I added a sawhorse hanger to the back of each sign and then I was done! Hopefully they bring in some good money for my daughters school!


Love this idea! Thanks for sharing your tips!
I see you share interesting content here, you can earn some additional money, your website has
big potential, for the monetizing method, just type in google – K2 advices how to monetize a website