Hey y’all! I am so excited to have Randi here guest posting today. She is not only one of my favorite blogging people, but she is also one of my real life friends! She is a fellow PNW girl and I was lucky enough to meet her in person at SNAP this year! I also got to crash her house on our way home from our family camping trip and I am pretty sure her son and my daughter became instant BFF’s!


————————
One crafting genre that has peaked my interest for some time now is hand metal stamping. You know what I mean right?
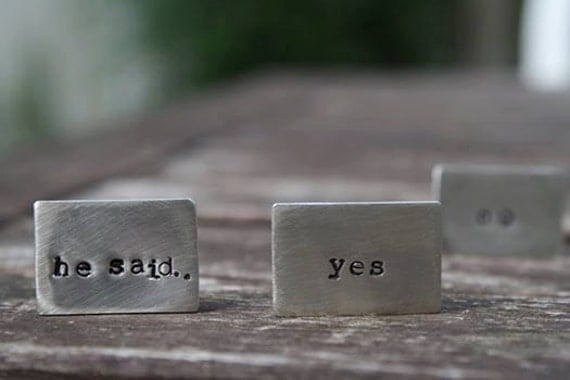
Take for instance these INCREDIBLE cufflinks that my friend Paige made when she asked her fiancé to marry her:
Super cute right? I totally love them! I love them so much I decided I needed to learn how to do hand stamping myself, so I did what any normal crafter would do, and I ran out to the craft store and I bought my own set of stamps and some metal materials to make stuff on. I had decided that I was going to hand make all my Christmas gifts doing metal stamping.
And then I got home with all my stuff and tried stamping my own stuff and well, it’s not as easy as it looks. It’s tedious and hard and LOUD! Definitely not something that I can do when the kids are sleeping and considering that is when I do most of my work…well let’s just say it was something I learned the hard way, that it wouldn’t be a craft that would make my regular rotation.
I quickly decided that the next best thing to do would be to find an alternative. Naturally, I couldn’t find just one way to recreate these fun hand stamped pieces. No…I went and found three, but I am only showing you one way today here on Ashley’s blog. The other two you will have to head over to my blog for.
I started off with a ball of silver polymer clay in the approximate size of a marble.
I rolled it out flat and did a rough estimate of the size of a metal washer. I’m sure I could have found a good cookie cutter of some sort but I didn’t have one so I improvised.
For the letters, I used a wooden letter stamp set that I got for $1 at Michael’s a few years ago. The best part about using the clay and rubber stamps is that when I did this…
it was super easy to fix. I just used my finger to carefully rub the backwards “E” off and then I restamped it the correct way.
I added a plastic faux silver bead just for some added fun.
Thanks, Ashley, for having me today! I enjoyed sharing this project with your readers!
 I’m Randi, the author at Sowdering About. I blog from a blue recliner in the wet city of Seattle where my family and I live. I write about my crafting adventures and parenting trials, because if you can’t find humor in your own life, then who will?
Want to see more? Follow along!


I love this idea! So are you telling me that I might have issues with the metal stamps I just purchased from PYP? I’ve been wanting to do some projects and Christmas gifts with them. Hmmmm Anyway, awesome post and I love the two photos of you and your kids together. So cute! xoxo
I wouldn’t automatically say you will have problems, but you will definitely need to make sure you have plenty of supplies to practice on first!