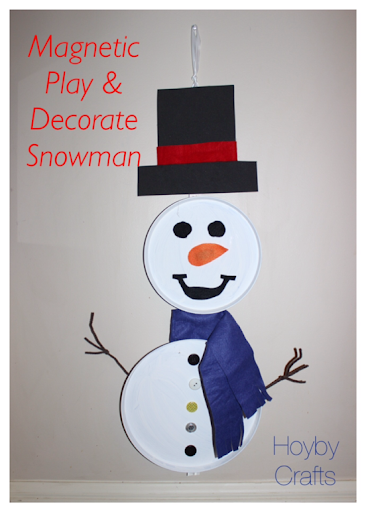
Hi there! I’m Shannon, and I am super excited to be a guest host at My Craftily Ever After! I blog at Hoyby Crafts, a blog that celebrates all things crafty and focuses on budget-friendly, seasonal, and children-inspired and created projects! Today, I’ll be sharing instructions to make this adorable snowman. Not only is it a great decoration to get you through the winter, but it also doubles to give your little ones the opportunity to manipulate its parts in any way they choose. If that’s not enough, most of the materials used for this project can be found at home or purchased at your local dollar store. In fact, the entire project cost me under $3.00! Here’s how you can make one of your very own…
Materials:
- stove burner cover set (I found mine at my local Dollar Tree and got a 2 piece set for $1 in 8″ and 10″ diameters!)
- white, acrylic paint
- foam brush
- hot glue gun/glue sticks
- 3-5 large buttons
- 1 sheet of black foam
- felt sheets or scraps-orange (nose), red (trim of hat), black (eyes and mouth)
- material for scarf (approx. 18″ in length)
- brown, pipe cleaners (3)
- magnetic strips or discs
Instructions:


7. Below the small burner cover, tie the material around the ribbon to make it look scarf-like. Under the scarf, place hot glue on the ribbon and adhere the front of the larger burner cover to it. Trim any excess ribbon below the large burner cover.


