Like most bloggers out there I belong to an obscene number of Facebook groups where we all share ideas, connect and look for support. The other day someone posted this image in one of those groups wanting to know how to get a text box like the one Rebecca uses for her disclosure. Rebecca’s is hard coded into her theme, but I’m a problem solver so I set about to find an easy solution for the rest of us. It took me about 10 minutes to figure out, so I thought I would share it with you all here!

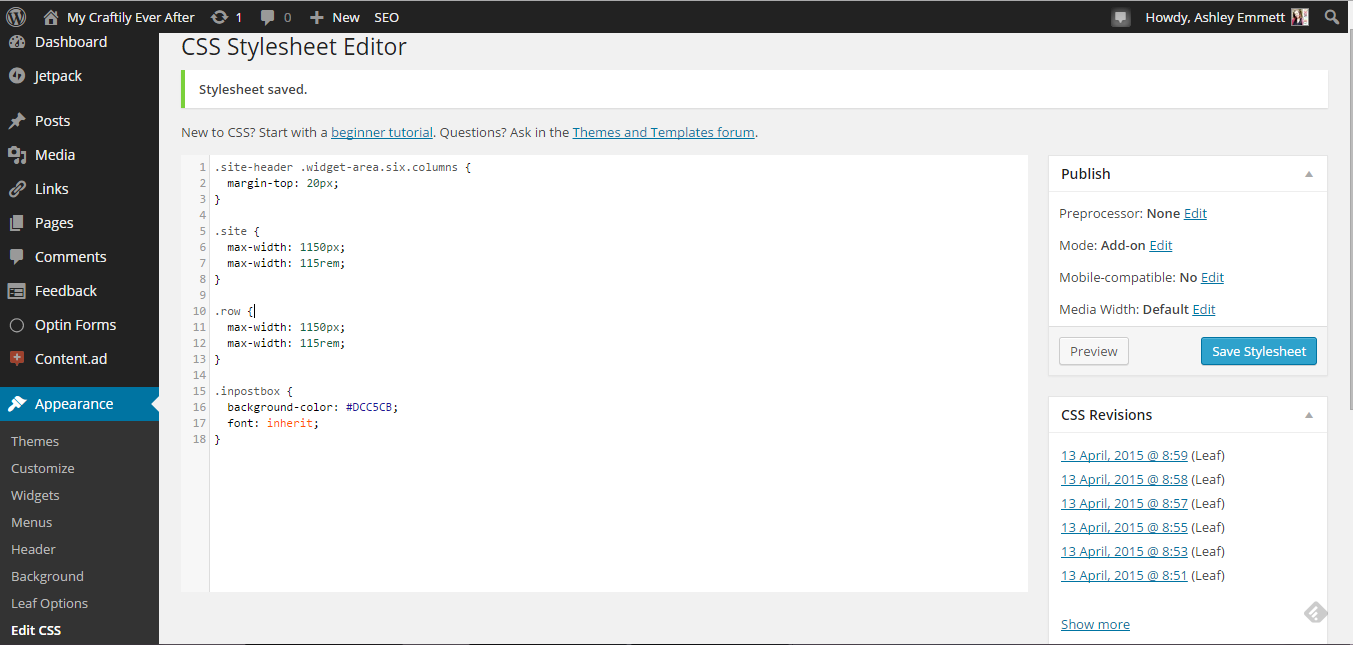
The first thing you need to do is go into the CSS Stylesheet Editor. This is super not scary, and I promise you won’t break it. Pinky promise. Go to Appearance then click on Edit CSS. You will get a screen that looks something like this. Yours might be blank, it might have other stuff there. Don’t worry, it’s all normal.

Now you are going to copy the code below and paste it into the Stylesheet Editor. This is where you get to have a little control over the design aspect. I wanted my background color to match my theme so I changed that to match. You can make yours any color you want.
.inpostbox {background-color: #DCC5CB; font: inherit;}
If you want to leave the background white and just have a colored border you will add this code instead. Make sure to change all those zeros into your color of choice.
.inpostbox {border: 1px solid #000000; font: inherit;}
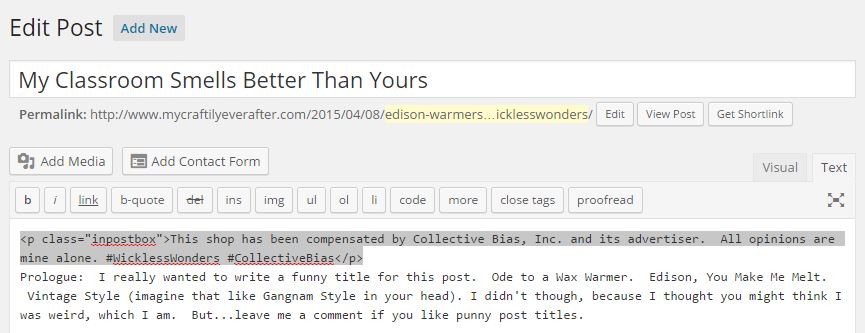
Now that you’ve got your code added to your stylesheet (you hit save right?), you need to add your code to your post. Simple click over to the html tab and add your code before and after the text you want in the box.
<p class=”inpostbox”>The text you want in the box goes here.</p>

Now when you flip back over to the visual tab you won’t be able to see a difference. However, when you preview (or publish) you’ll see your beautiful box!

Leave me a note if you have any questions. I hope this helps you and if it does, share it with a friend!!

This is amazing! Thank you for the tutorial.