Hey everyone! It’s Kelly from Here Comes the Sun. Ashley has graciously let me take over her site today so I can guest post on one of my favorite topics, graphic design. Specifically, how to digitize your own handwriting.
Let’s talk handwriting. Do you love yours? Mine is so-so. I’ve been practicing my hand lettering lately and I’m still mastering this technique. There are times when I think my hand lettering is AMAZING and there are times when it downright stinks. So when I get those rare instances when I’m proud of a piece of hand lettering that I’ve done, I like to digitize it to preserve it. Today I’m going to teach YOU how you can digitize your handwriting.

Digitizing your hand lettering is a great way to incorporate hand drawn items into digital design, like this piece of artwork that I created this past Spring.

That print is my own hand lettering overlayed onto a digital watercolor background and here’s how you do it.
HOW TO DIGITIZE YOUR HANDWRITING
First, you need to create some hand lettering. You’ll want to do your lettering in black on a white piece of paper. I’m using the lettering from the project above. When you are finished with your lettering, snap a picture of it. Upload that picture into a graphic design program. I’m using Photoshop Elements. It may look discolored depending on how the lighting was when you took the picture. Don’t worry, we’re going to fix that!
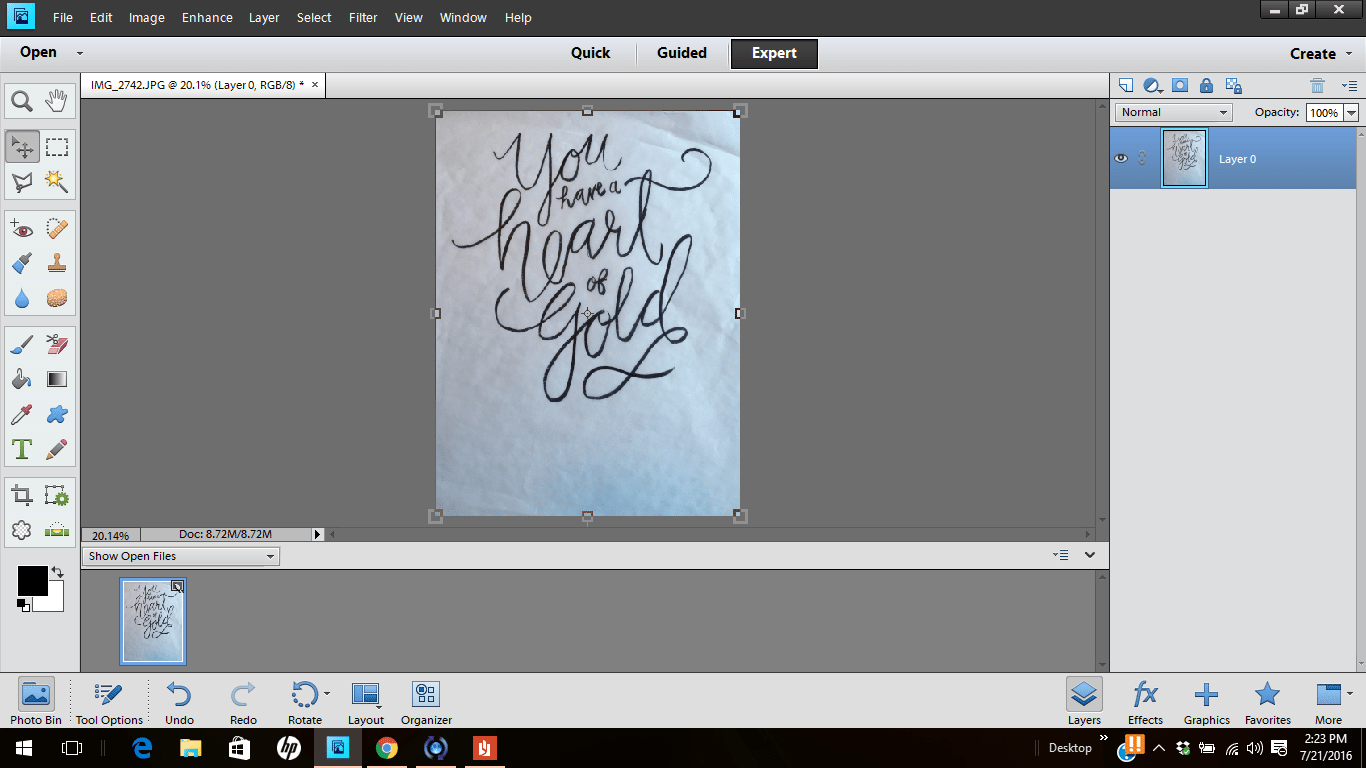
Once you have your file opened in Photoshop Elements, the goal is to make the background as white as you can and the letters as dark as you can. To do this, first change your file from “Background” to “Layer” so that it is editable by double clicking on the background layer.
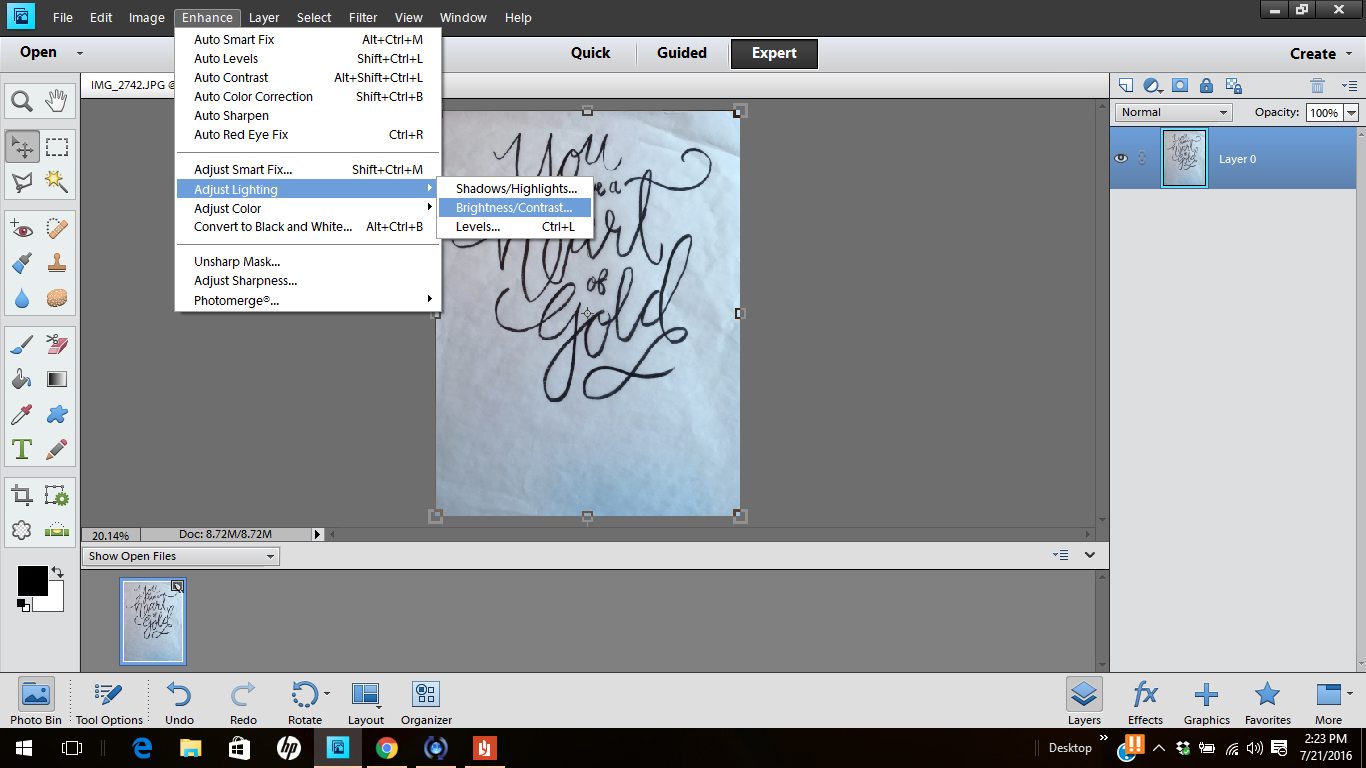
Next, you’re going to adjust the contrast. Enhance > Adjust Lighting > Brightness/Contrast.
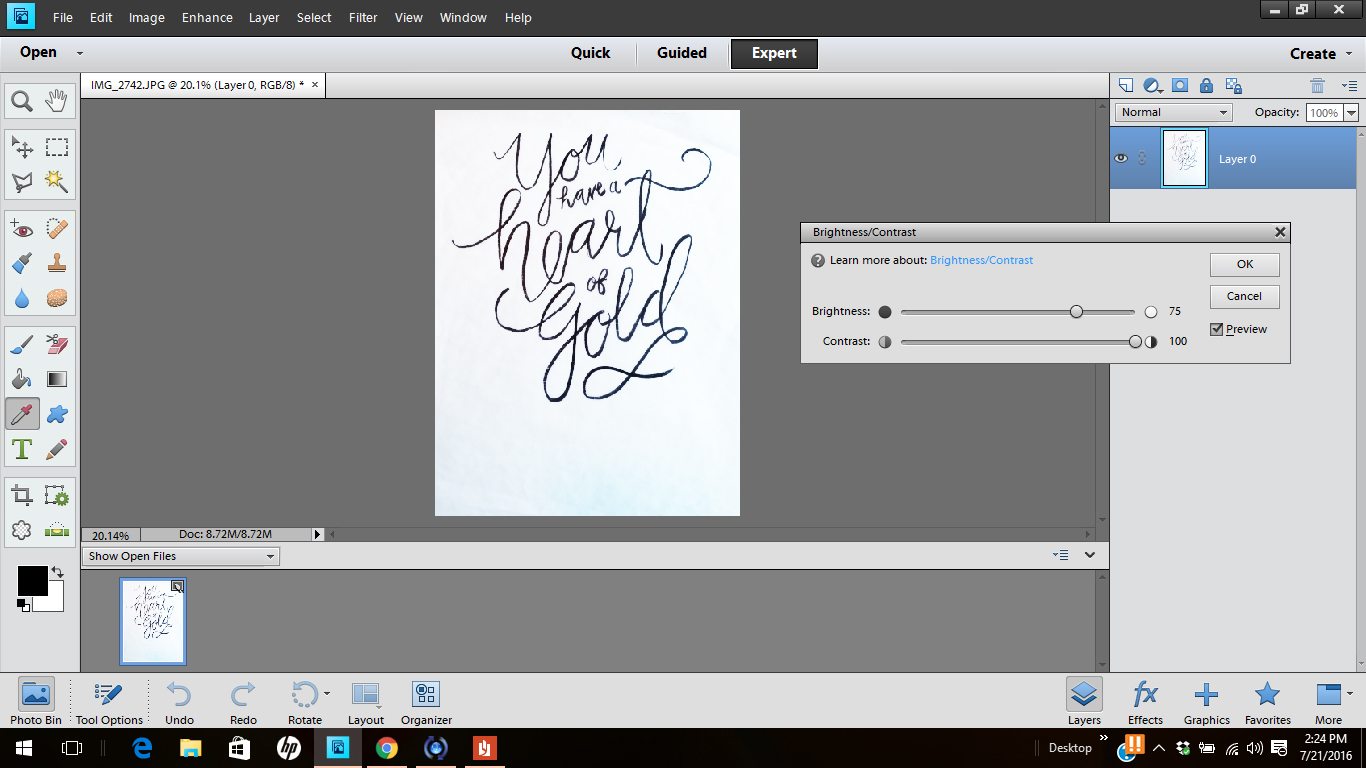
Slide the Contrast and Brightness to the right. You should now have a very white background and very dark lettering.
Use the magic wand tool and select the white background. Just click on the magic wand tool and then click on the white area of your file.
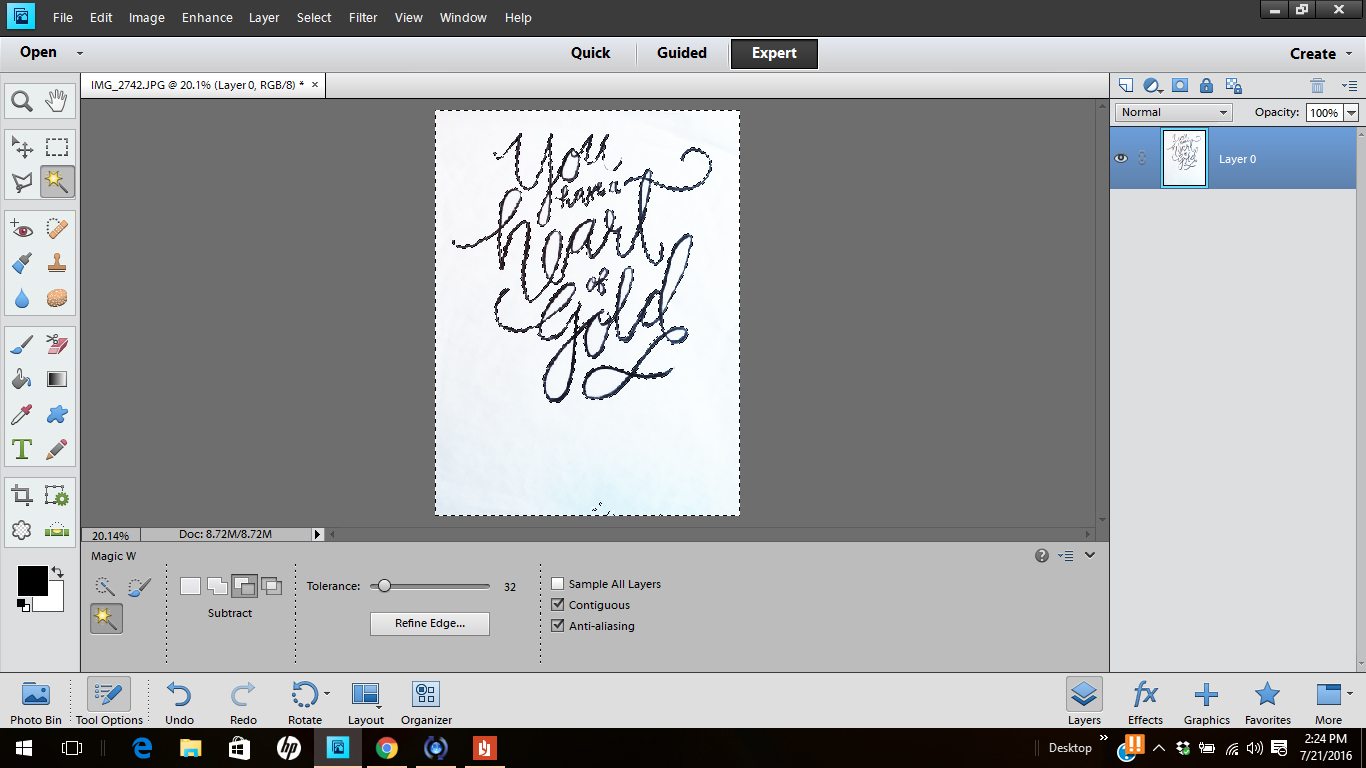
Hit DELETE and the white background will disappear, leaving you with text on a transparent background. You can see below that there are still some portions of my file that are white. If this happens to you, all you need to do is use the magic wand tool again to select each white area and hit DELETE.
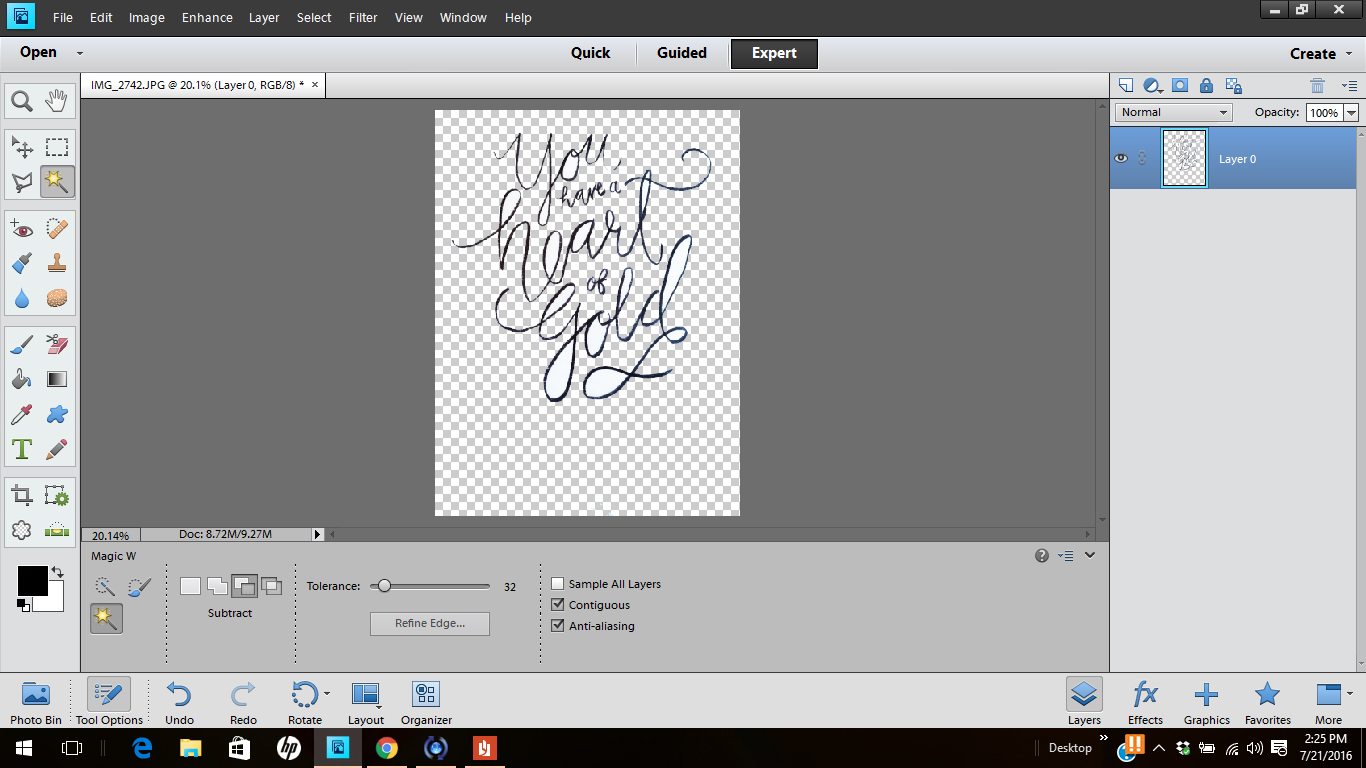
Now you can overlay that text onto any image that you want. I chose this picture of my daughter.

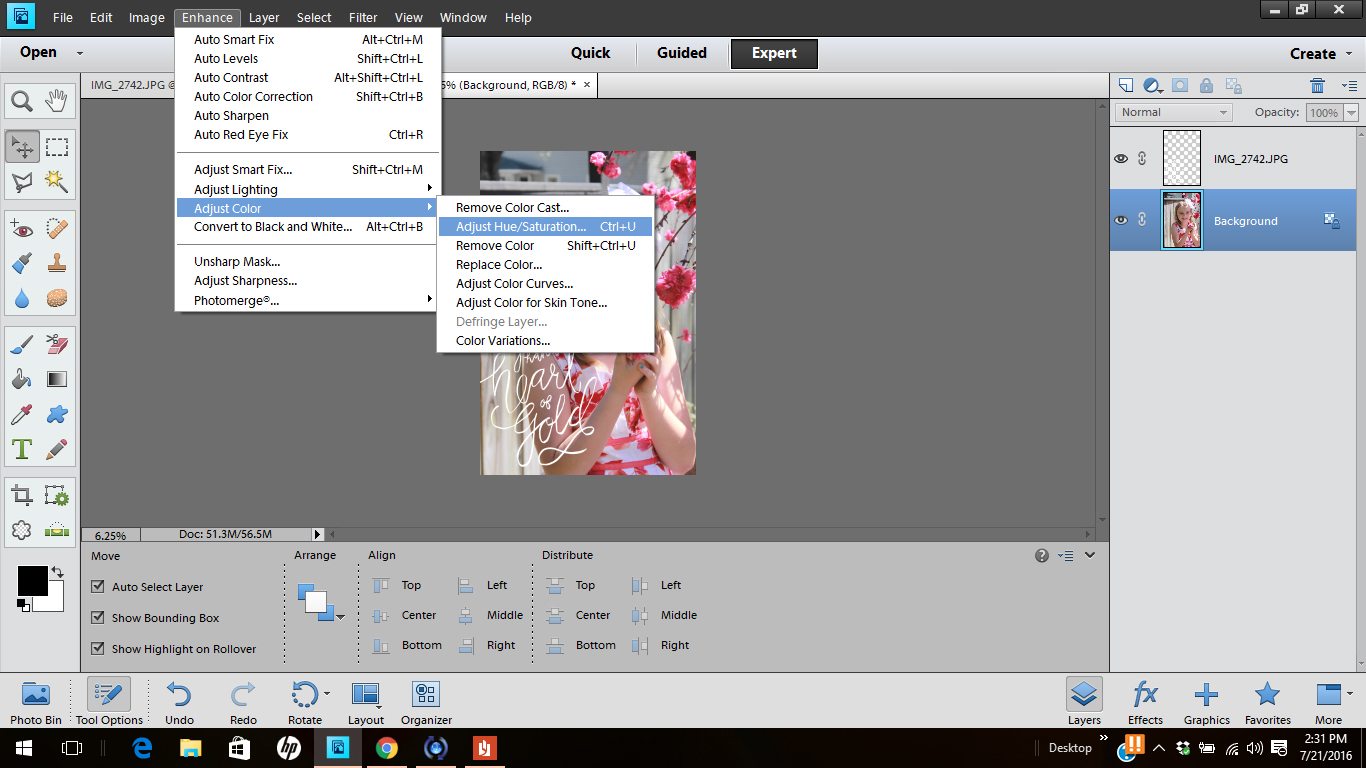
Want to change the color of the text like I did? No problem, simply click Enhance > Adjust Color > Adjust Hue/Saturation
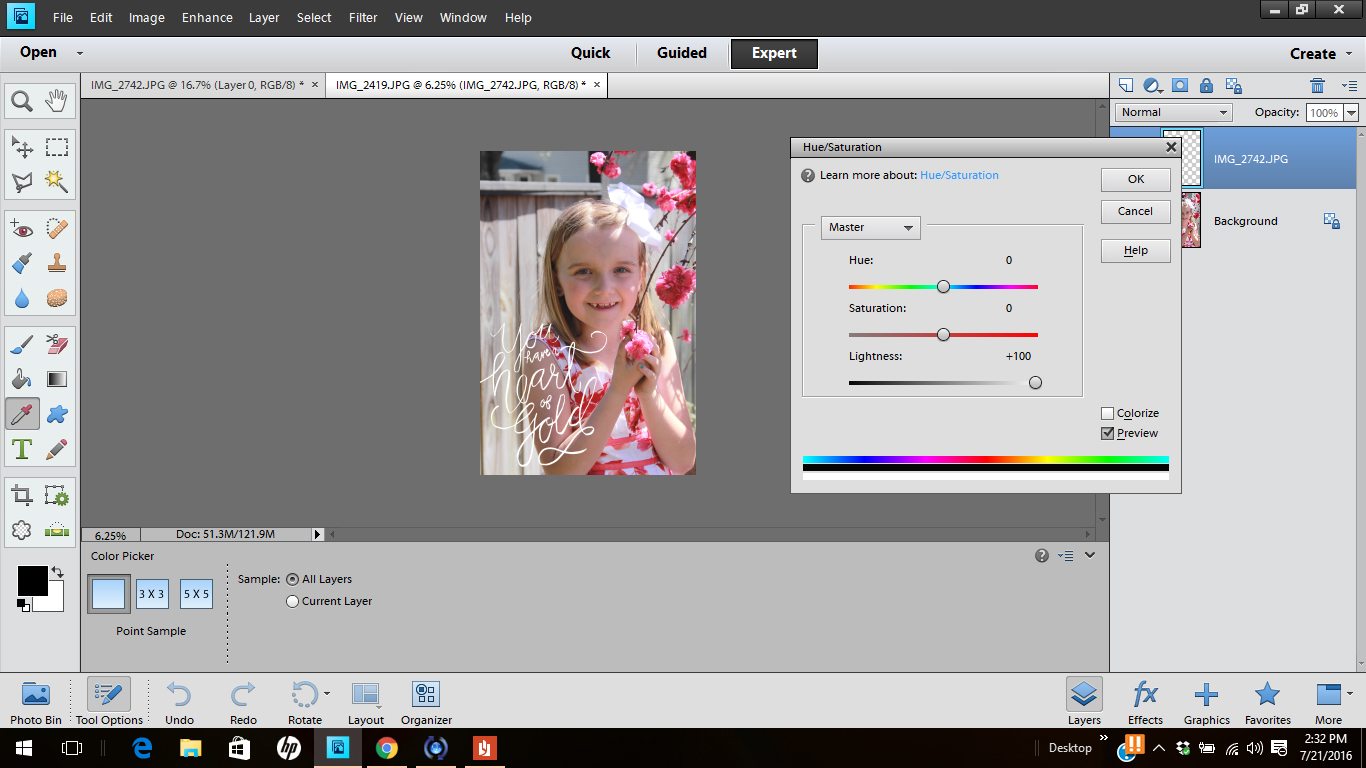
Slide the Lightness slider to the right to turn the text white. And now you have a photo with YOUR handwriting overlayed on it.
I’m a big fan of Photoshop Elements and love how user friendly it is. That is why I am so excited to announce my brand new eBook, Photoshop Elements for Creative Entrepreneurs.
I’m so excited that I finally get to share this eBook with all of you. Graphic design is one of my passions and I love to teach people how to do it the easy way. This book is for both beginners and intermediate users. And you don’t have to be an aspiring (or current) entrepreneur to gain knowledge from the book.
I use my graphic design skills for my blog and Etsy business and this book will help you to do the same if you have a small (or large) business. But the skills that you learn in this book translate to any type of graphic design that you want to do, whether it be for personal use or commercial use. I would love for you to take a look at all this book has to offer. You can learn more about the book and purchase it by clicking below.
Thank you, Ashley, for letting me take over your site today!


