We wrapped up our first chapter last week and our final project was AMAZING if I do say so myself. We are slowly working through the six elements of art and this first chapter was all about line. We learned about the different kinds of lines, the variations of lines and the expressive qualities of line. Our final project was a combination of the all of these things, plus a change for my students to express some creativity.
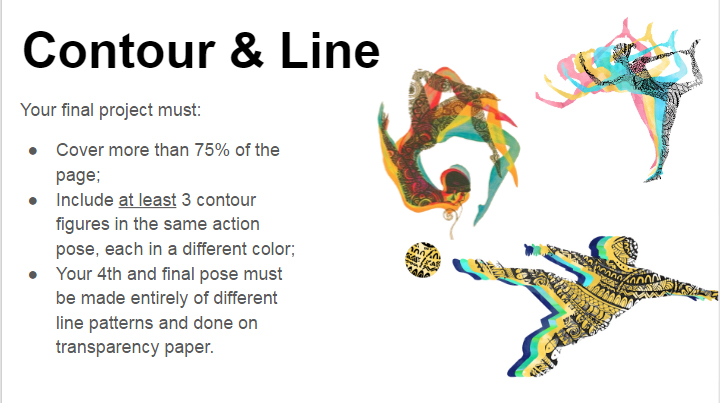
As always I started off with a list of MUSTS. I try to keep these to a minimum so that students are free to create a project that really demonstrates their learning and their creativity.
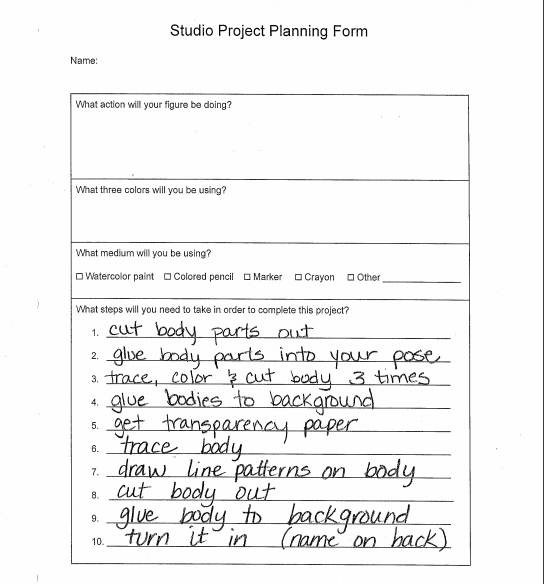
Once I had covered the list of musts, I moved on to a planning sheet. I received a lot of flack from the kids for this step, however, it is an amazing tool when the kids say, “what do I do now!??” in that super whiny voice. The planning sheet is very straight forward and the most important part is the “steps to complete” section. You can download a blank planning sheet here, and there is a copy of one with the steps listed below.
I built a couple of gatekeeper steps into the process so that not a single student can get to the end of the project without me seeing their work at least 2 times along the way. The first one came immediately after the planning sheet. In order for the kids to get their copy of the figure, I had to sign off on their planning sheet. This ensured that each and every student had the correct steps in the correct order on their form before they ever started.
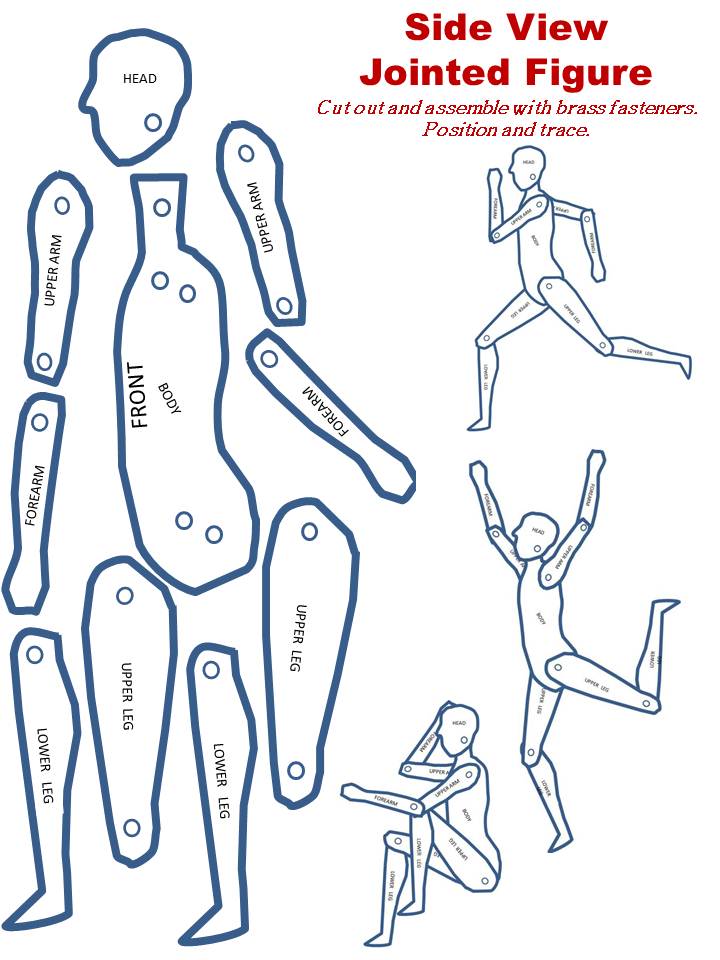
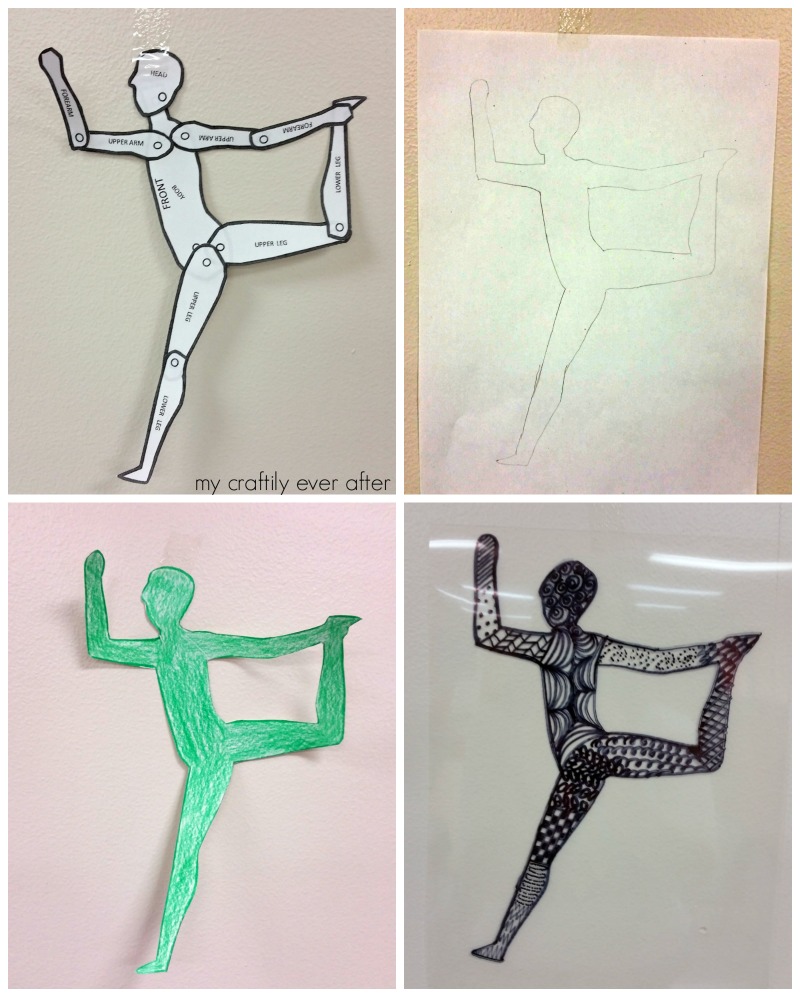
Once they had their figure page, they cut out all the pieces and then glued it into their action pose. This provided a lot of opportunity to talk about the different parts of body and what the difference between a forearm and an upper leg is! If you click on the image below it will open a PDF you can print for yourself!
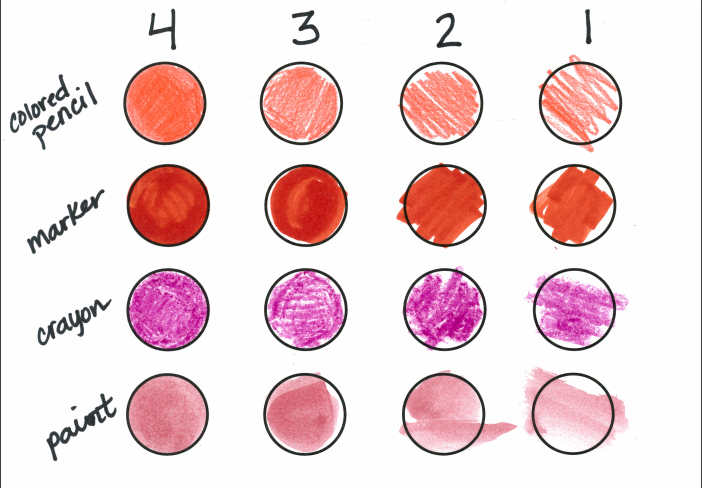
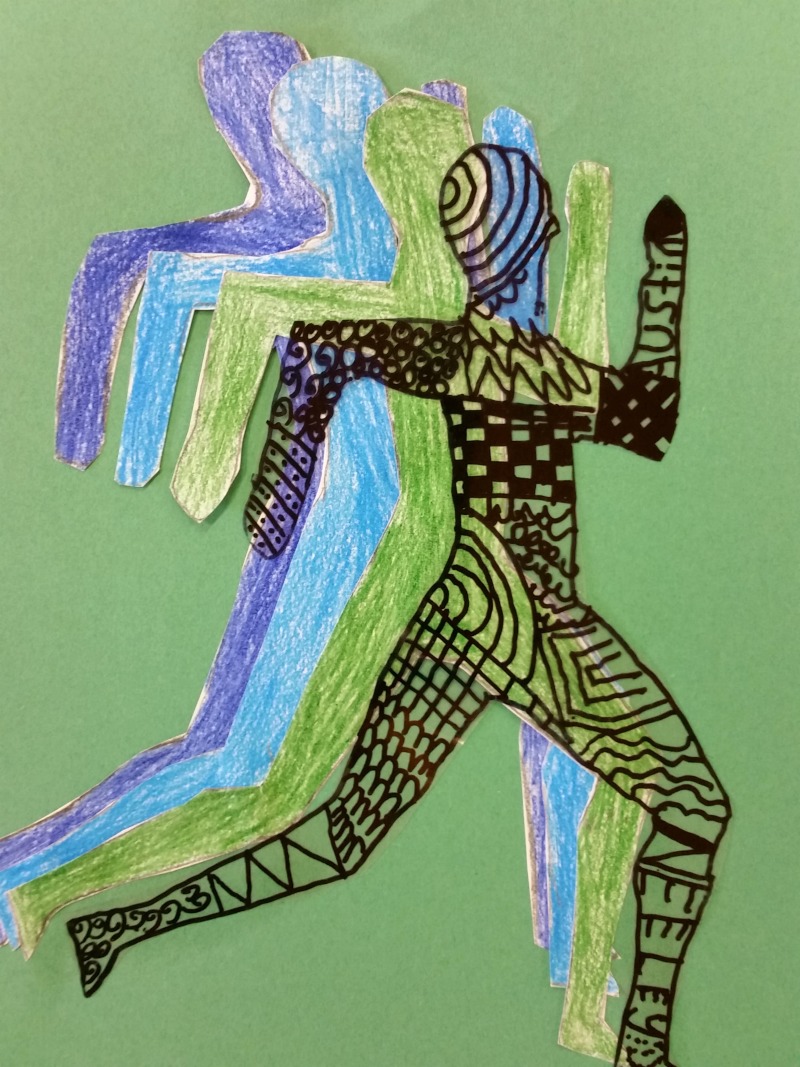
Once their bodies were glued in place they needed to lightly trace around them three times on three separate pieces of paper. Once they were traced, they needed to color those bodies in! I provided them with a graphic rubric for coloring, which shocked them! But, yes, I am grading their coloring.
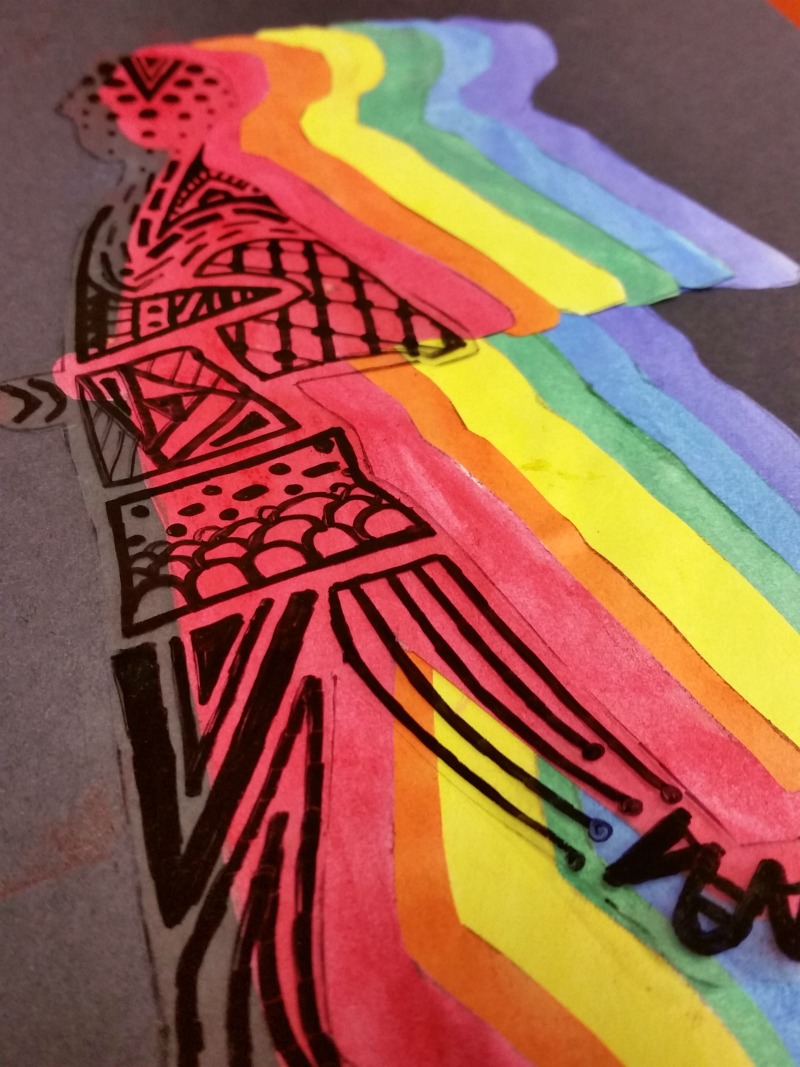
After all the coloring was done, they cut those colorful bodies out and glued them down to their background paper. I let them choose whatever color they wanted for their background, which caused so much joy! This is also where I had gate keeper step. In order to get their transparency sheet, they had to show me their completed background with three bodies glued to it. This ensured that everyone went in to the final step with all their pieces in place.
The last step was the most time consuming and I allotted an entire class period for just it. They needed to trace their body shape on the clear transparency with a Sharpie. They had to go super slow, and be extra careful, because you can’t erase Sharpie! Luckily they all had plenty of practice tracing those bodies by then. Once they had their shape traced they needed to fill it in with at least five different kinds of lines and patterns. Finally, once it was completely patterned they cut it out and glued it down on top of their top most colorful body.
